Deploy Your First App
This guide walks you through deploying your first application on Kuploy. By the end, you'll have a running application accessible via a platform-provided domain.
What happens once you connect a repository:
Each push repeats it. You configure the first two steps; the rest is automatic.
Prerequisites
- A Kuploy account
- A Git repository with your application code (GitHub, GitLab, or Bitbucket)
Create a Project
Projects help you organize related applications, databases, and resources.
- Navigate to your Kuploy dashboard
- Click New Project
- Enter a project name (e.g., "my-web-app")
- Select your preferred region
- Click Create Project
Choose a region closest to your users for the best performance.
Add an Application
Inside your project, click Create Service → Application. That opens a five-step wizard — Source, Build, Network, Registry, Deploy.
Each step saves on its own, so you can close the wizard and pick it up later; the step markers show which are done.
Step 1 — Source
Choose where your code comes from. GitHub, GitLab, Bitbucket, Gitea, a Docker image, a plain Git URL, or a direct upload.
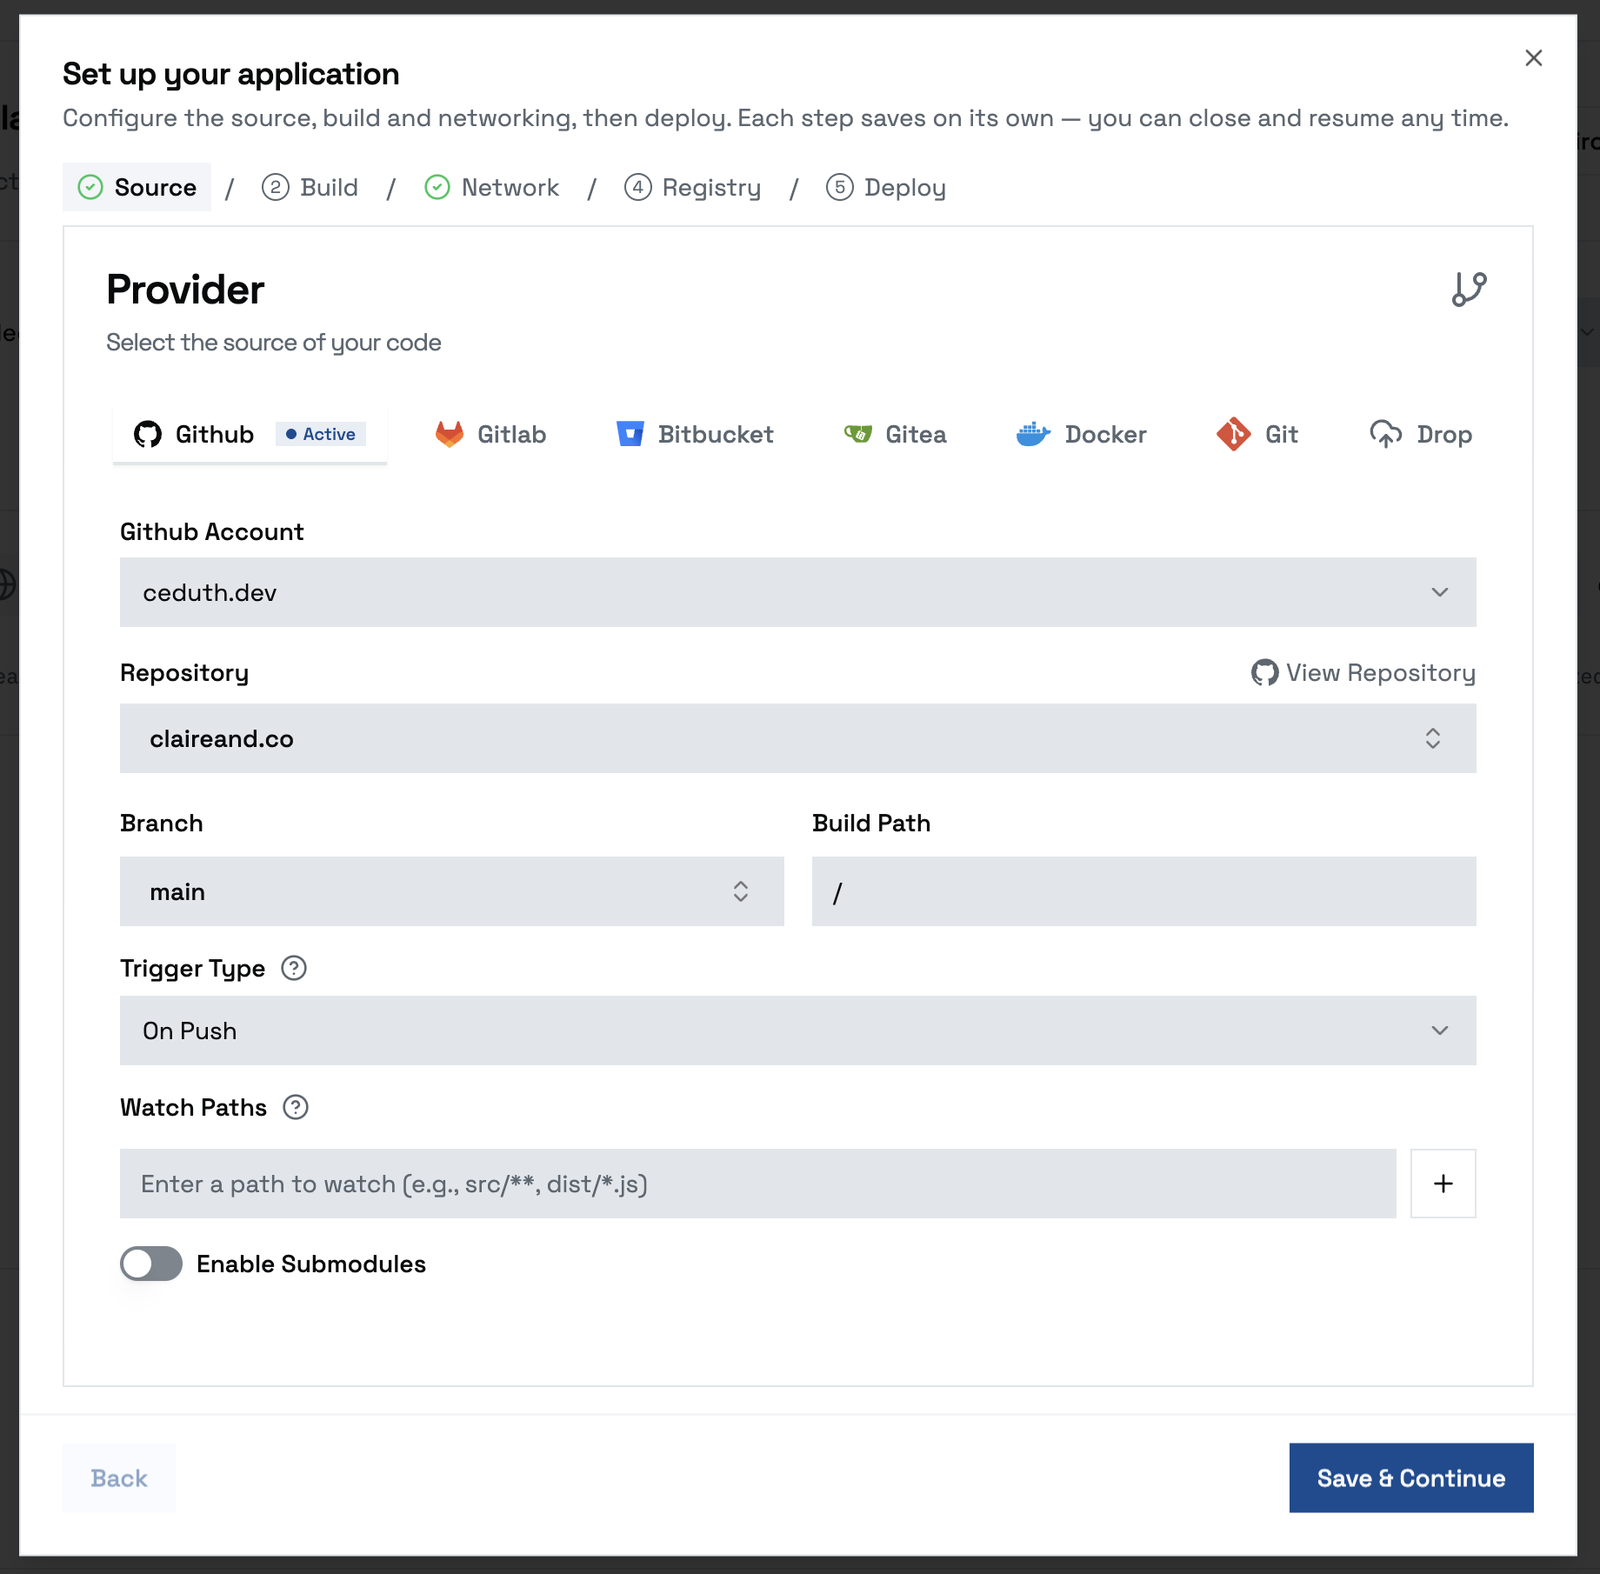
Pick the account and repository, then the branch to deploy — usually main.
Trigger Type decides what causes a deployment: On Push for every push to
that branch, and Watch Paths narrows it further so a change outside those
paths doesn't rebuild.
If you don't see your repositories, connect the Git provider first.
Step 2 — Build
Kuploy supports multiple build methods. For a detailed comparison, see Build Methods.
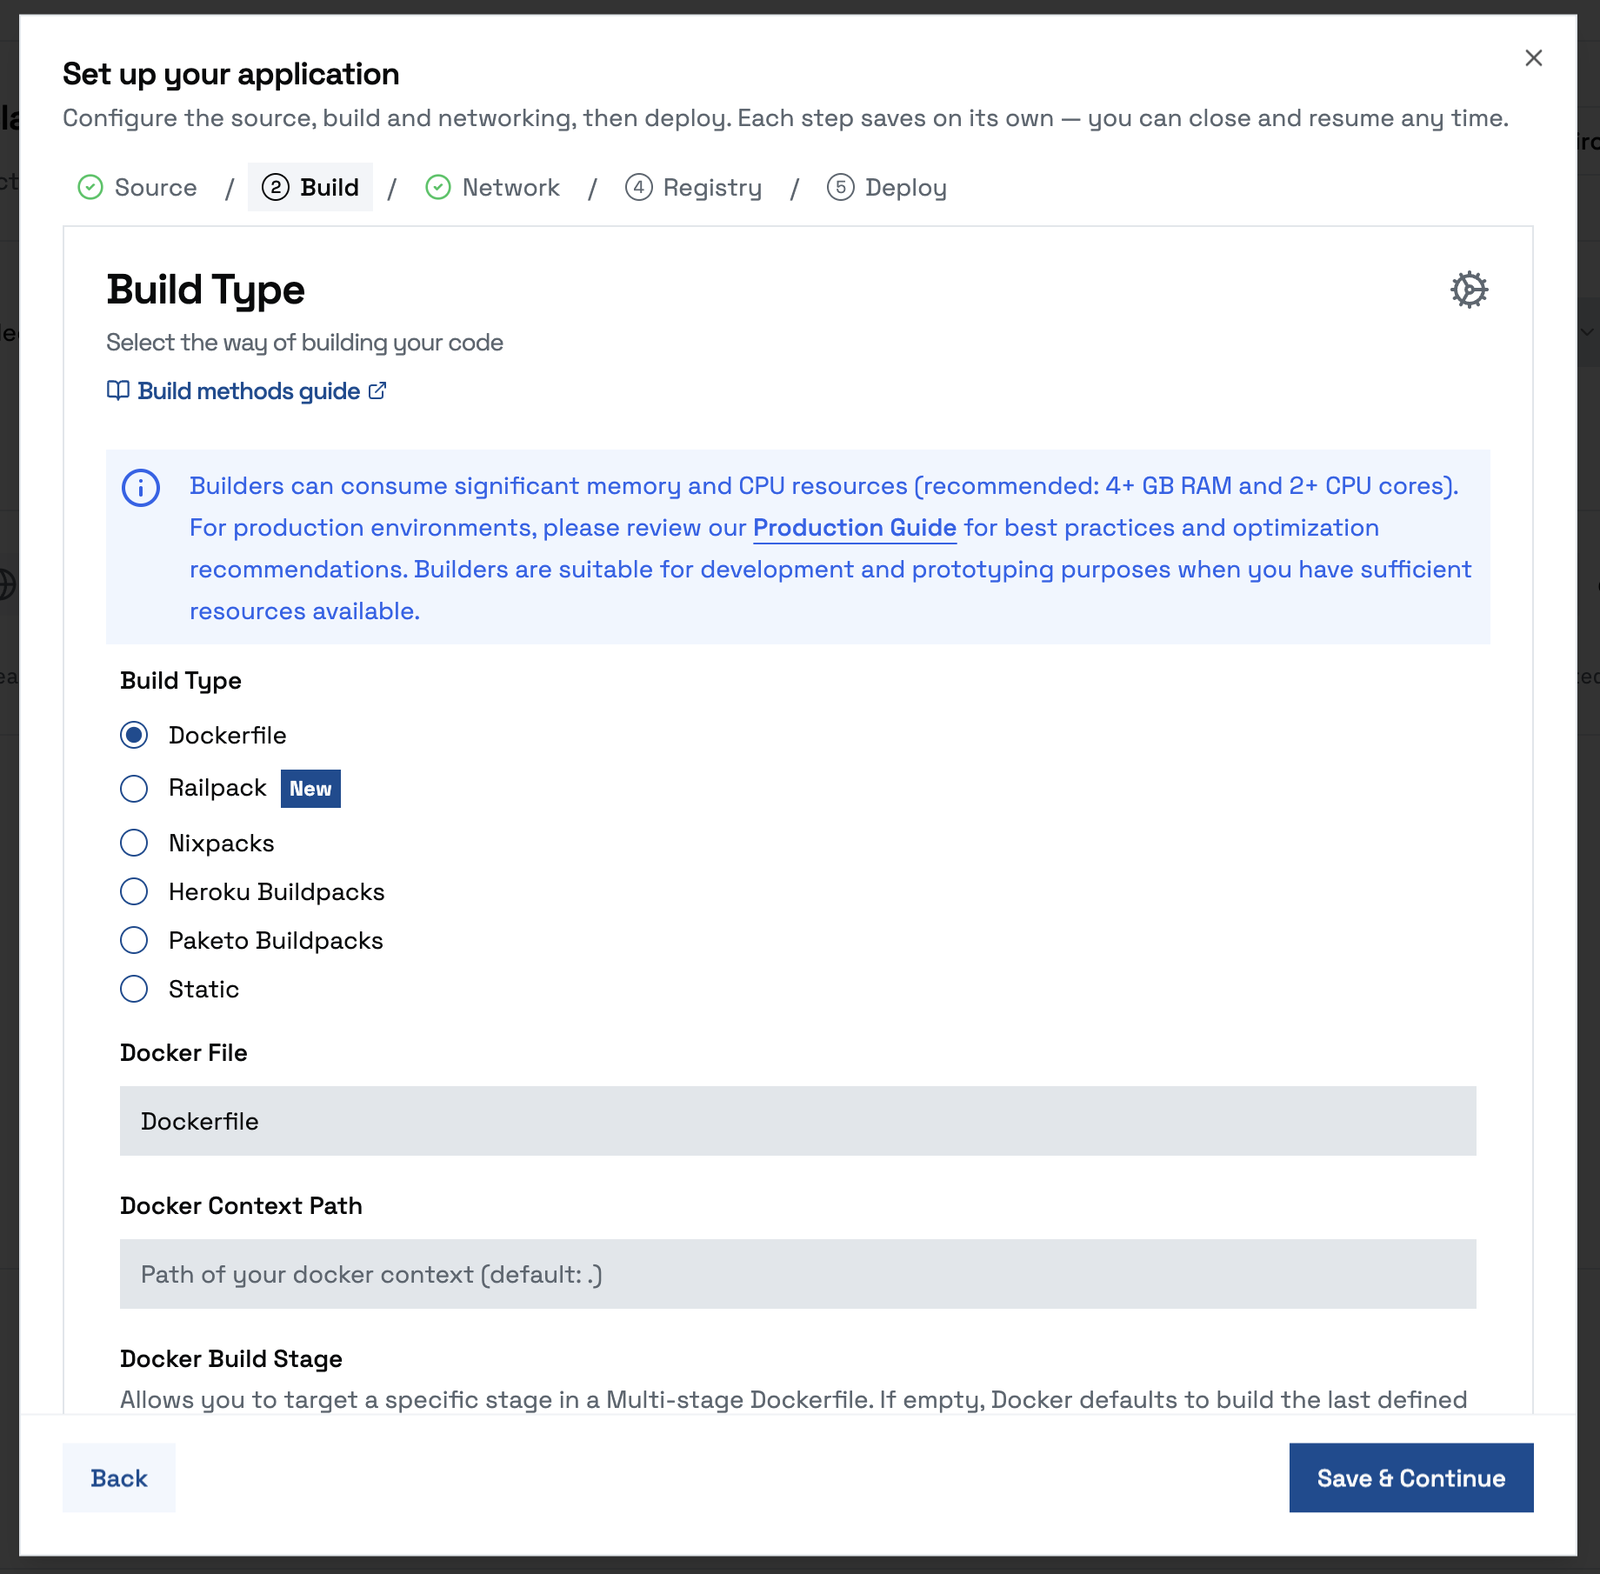
Nixpacks (Recommended)
Nixpacks automatically detects your application's language and framework, then builds an optimized container image.
Supported languages include:
- Node.js / JavaScript / TypeScript
- Python
- Go
- Rust
- Ruby
- PHP
- Java
- .NET
- And many more
# Nixpacks automatically detects your app type
# No configuration needed for most applications
Nixpacks is the default and recommended option for most applications. It requires zero configuration for standard projects.
Dockerfile
If you have specific requirements, you can use your own Dockerfile:
- Select Dockerfile as the build method
- Specify the Dockerfile path (default:
Dockerfile) - Optionally set the build context
# Example Dockerfile for a Node.js app
FROM node:20-alpine

WORKDIR /app
COPY package*.json ./
RUN npm ci --only=production
COPY . .

EXPOSE 3000
CMD ["npm", "start"]
Buildpacks
Cloud Native Buildpacks provide another automated build option:
- Select Buildpacks as the build method
- Choose a buildpack provider (Heroku, Paketo, or Google)
- Configure any required build environment variables
Step 3 — Network
Set the port your app listens on and attach a domain. You can skip this and add a domain later.
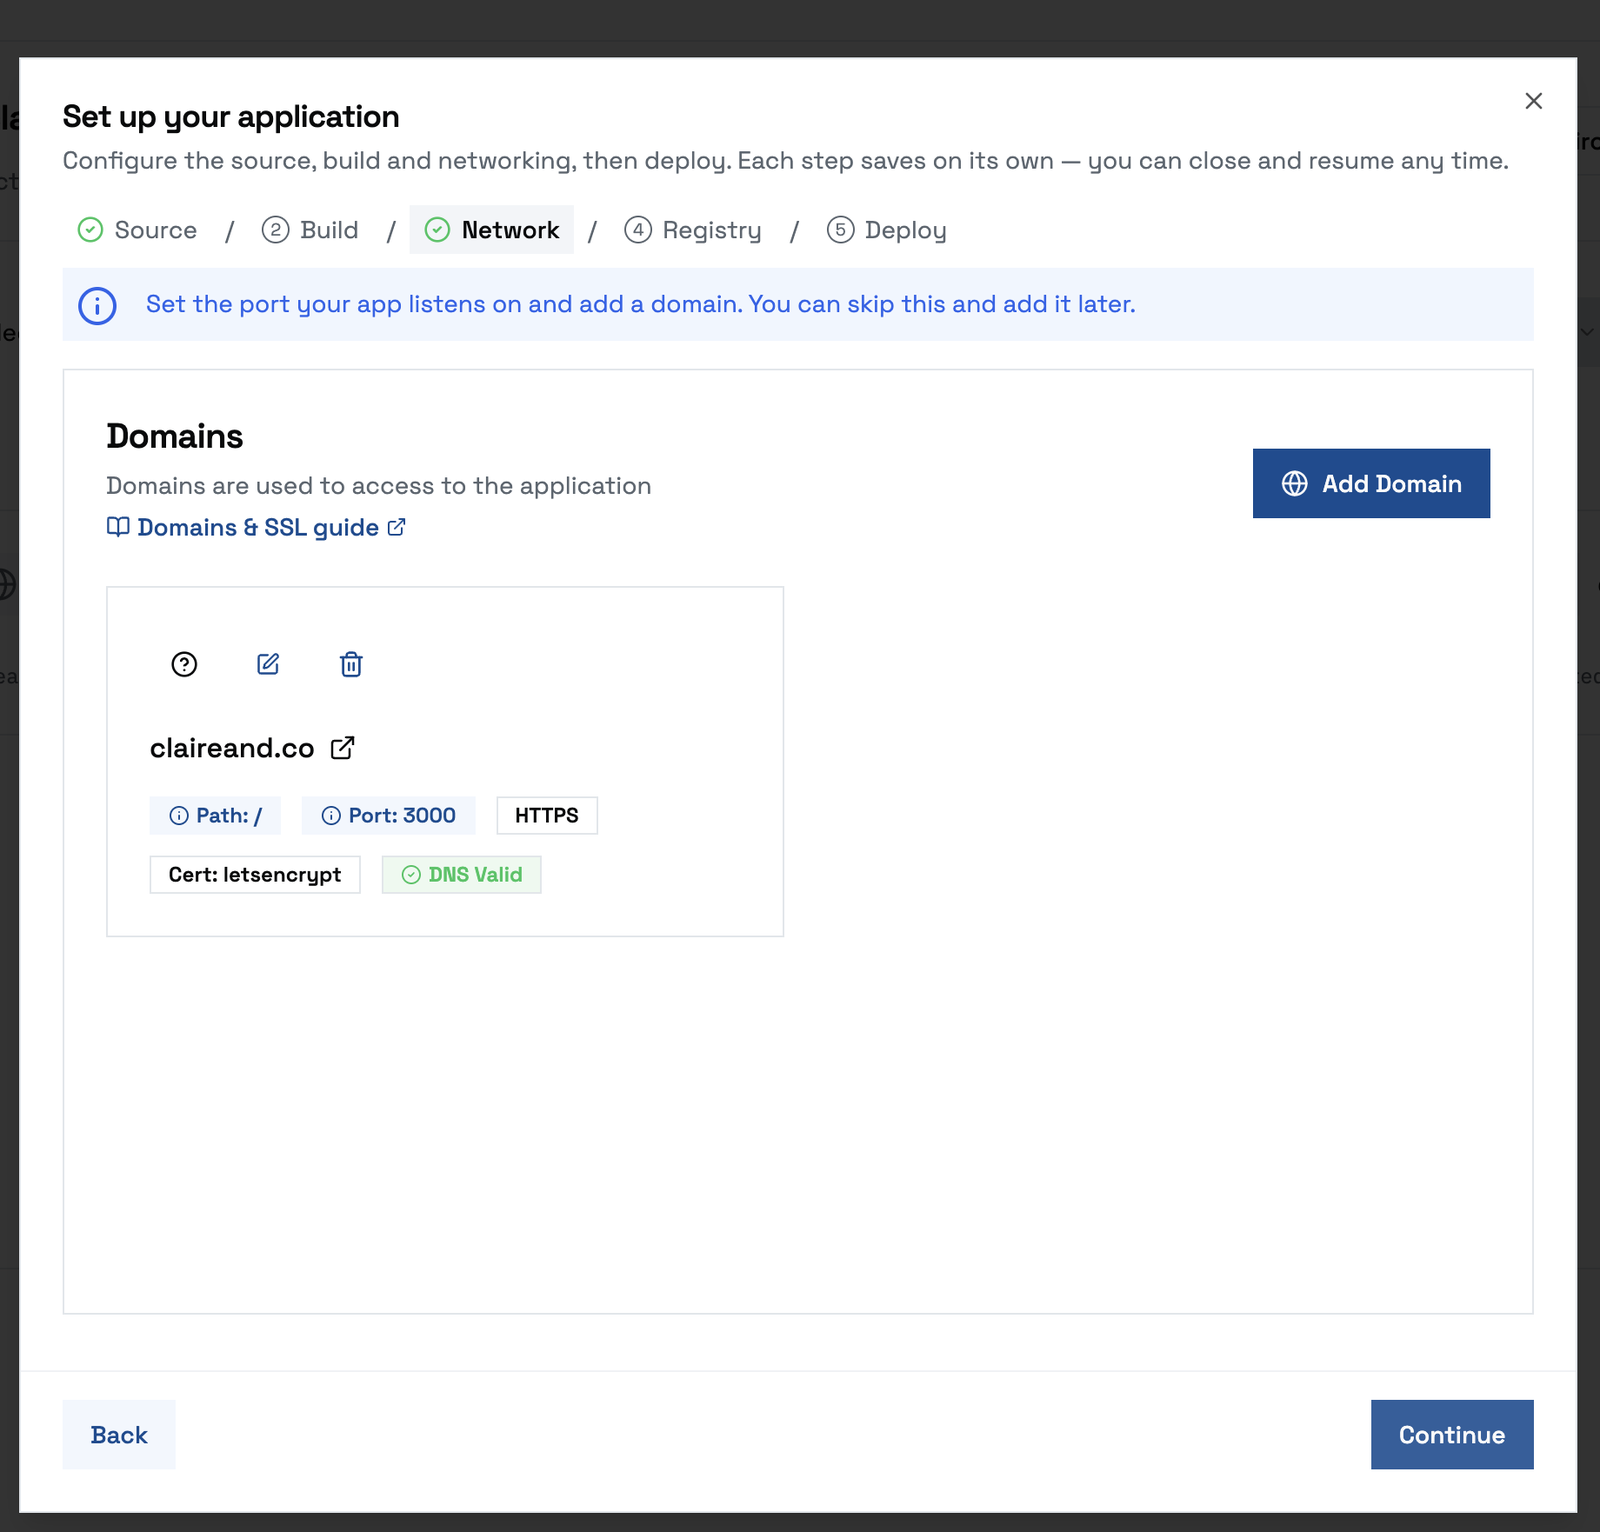
Editing a domain opens its own panel — the host, the path it answers on, the Container Port your app actually listens on inside the container, and whether to provision a certificate.
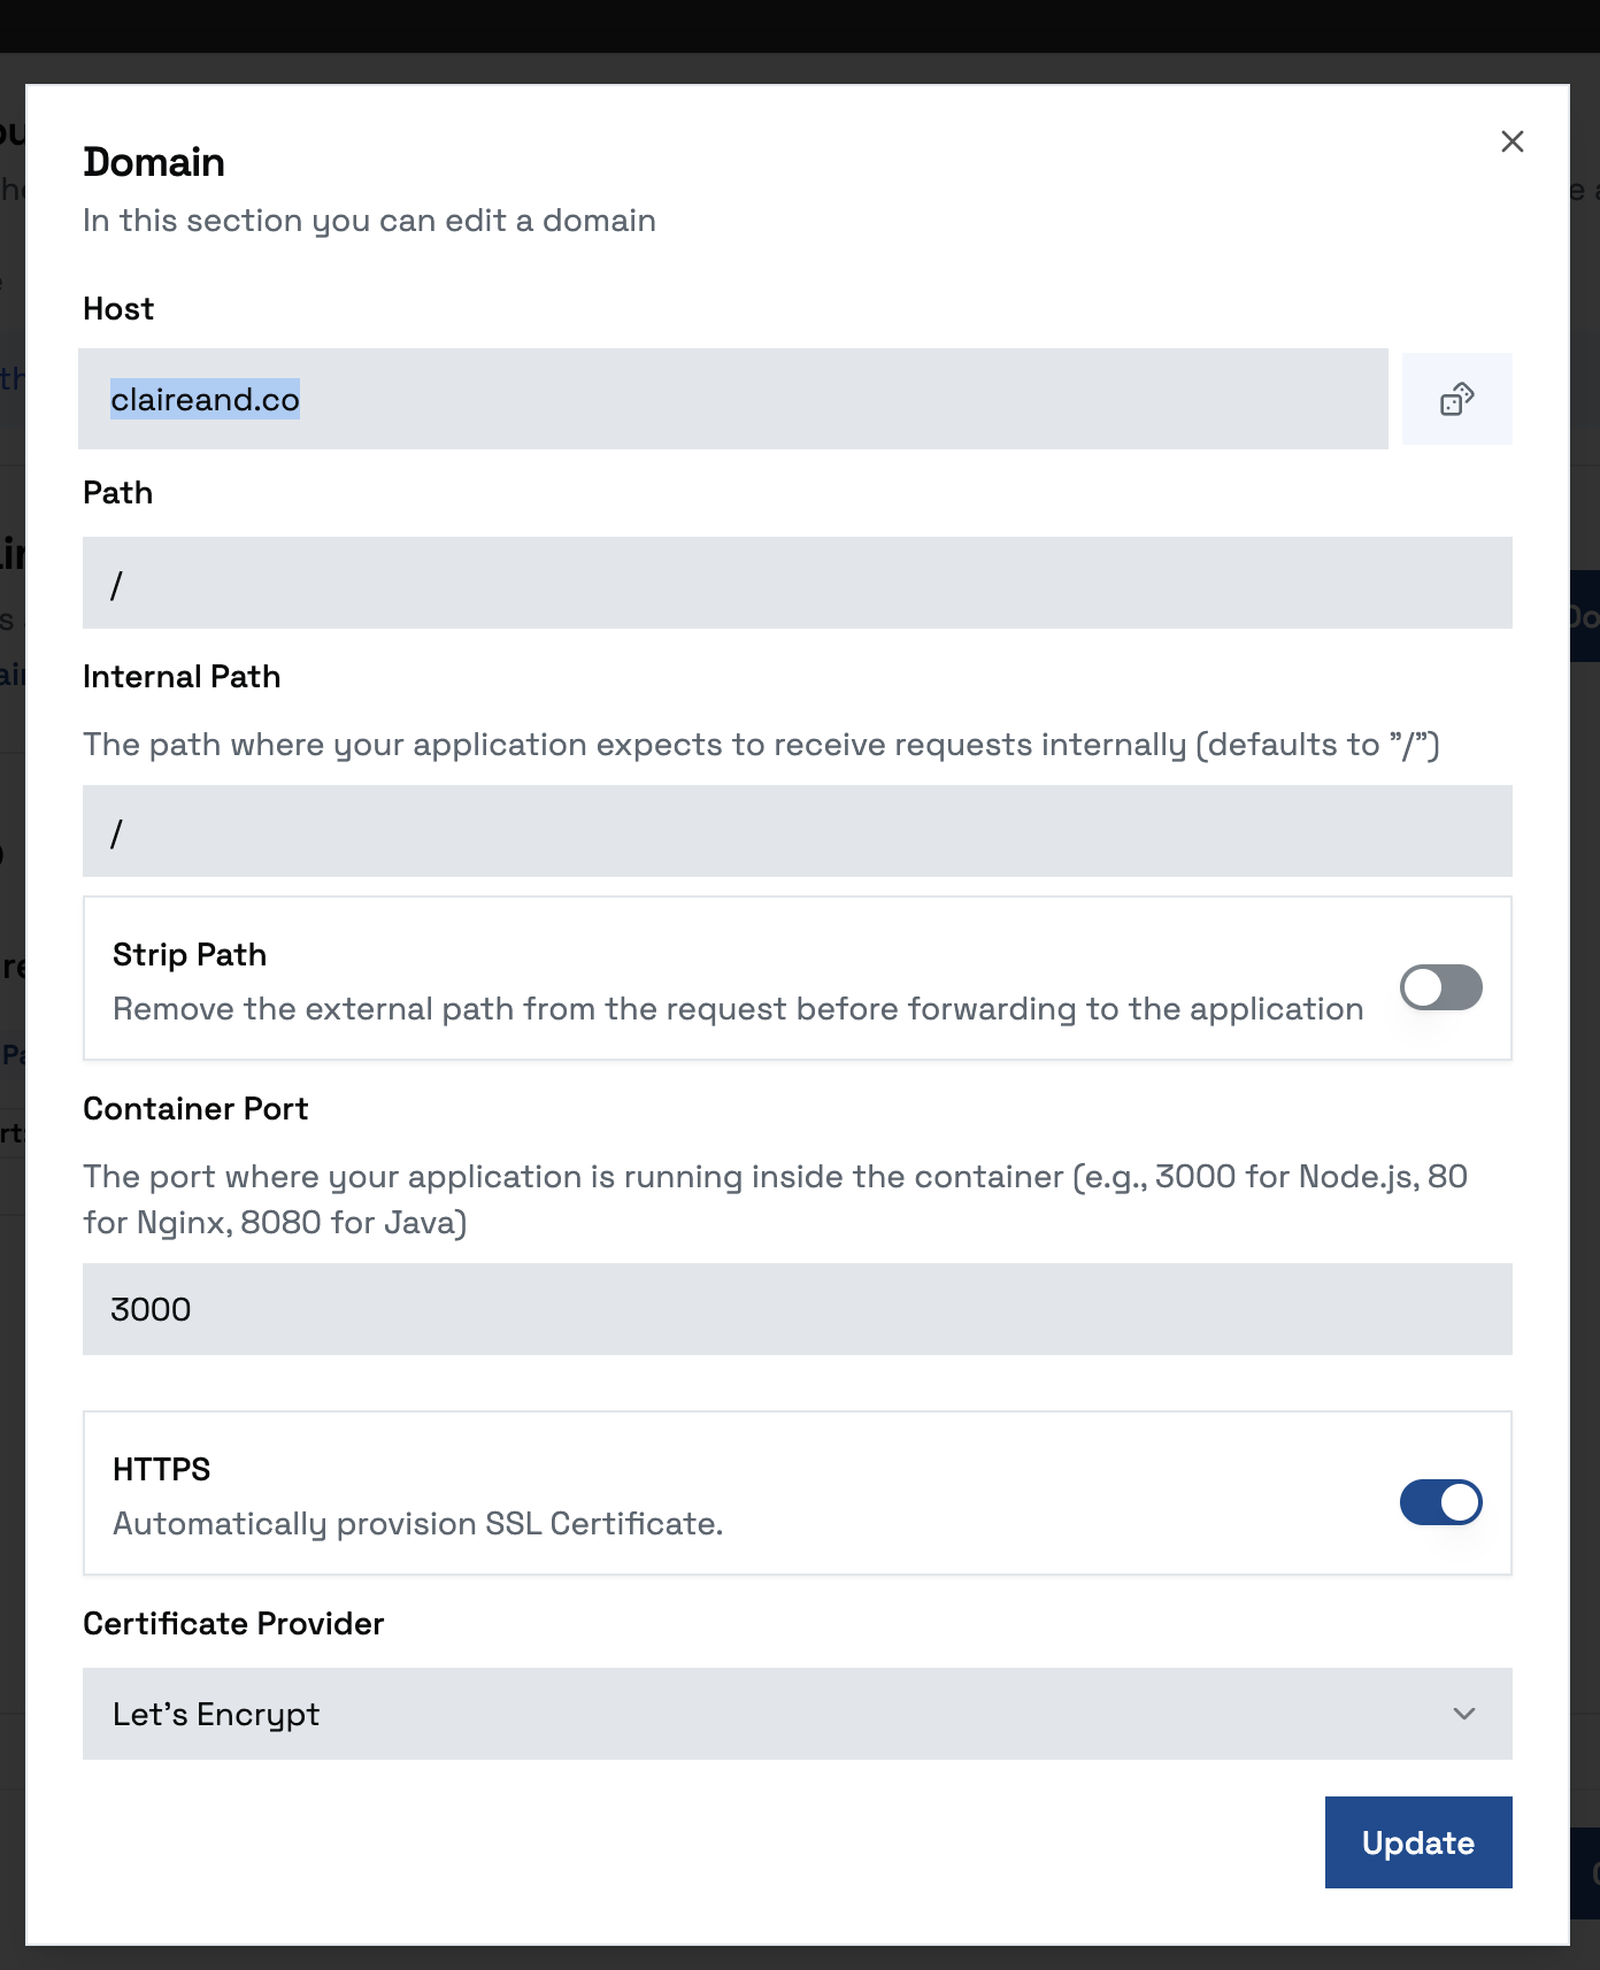
Container Port is the one people get wrong: it is the port inside the container — 3000 for a typical Node app, 80 for Nginx, 8080 for Java — not the port the domain is served on.
Step 4 — Registry
Kubernetes pulls your built image from a registry, so a build registry has to be selected before the deploy can run.
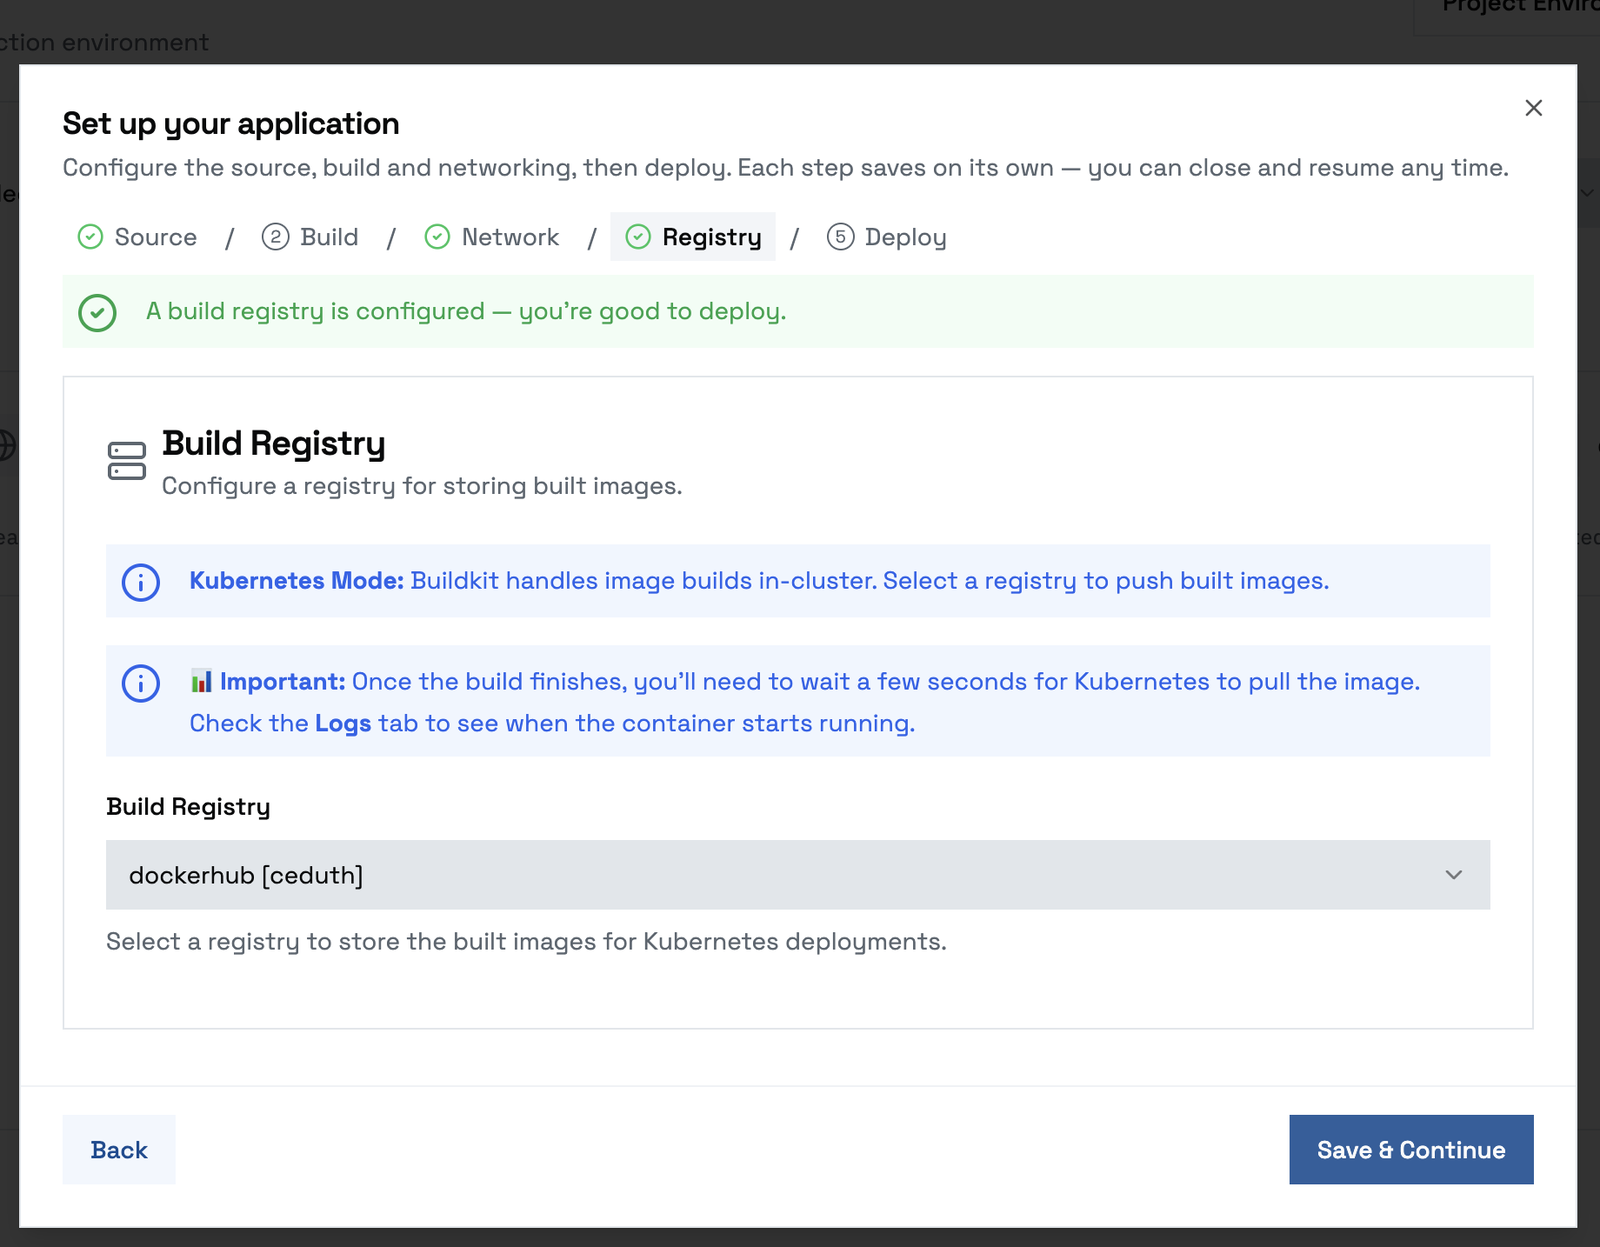
Until one is chosen the step warns you; once it is, it turns green and the Deploy step unlocks. The image is pushed there by the in-cluster builder, then pulled back by Kubernetes — which is why there is a short wait after the build finishes before the container is actually running.
Resource Allocation
Configure CPU and memory limits:
| Plan | CPU | Memory |
|---|---|---|
| Starter | 0.5 vCPU | 512 MB |
| Standard | 1 vCPU | 1 GB |
| Pro | 2 vCPU | 4 GB |
Step 5 — Deploy
The last step restates what is configured and what is missing. When everything is set, Deploy downloads the source and builds.
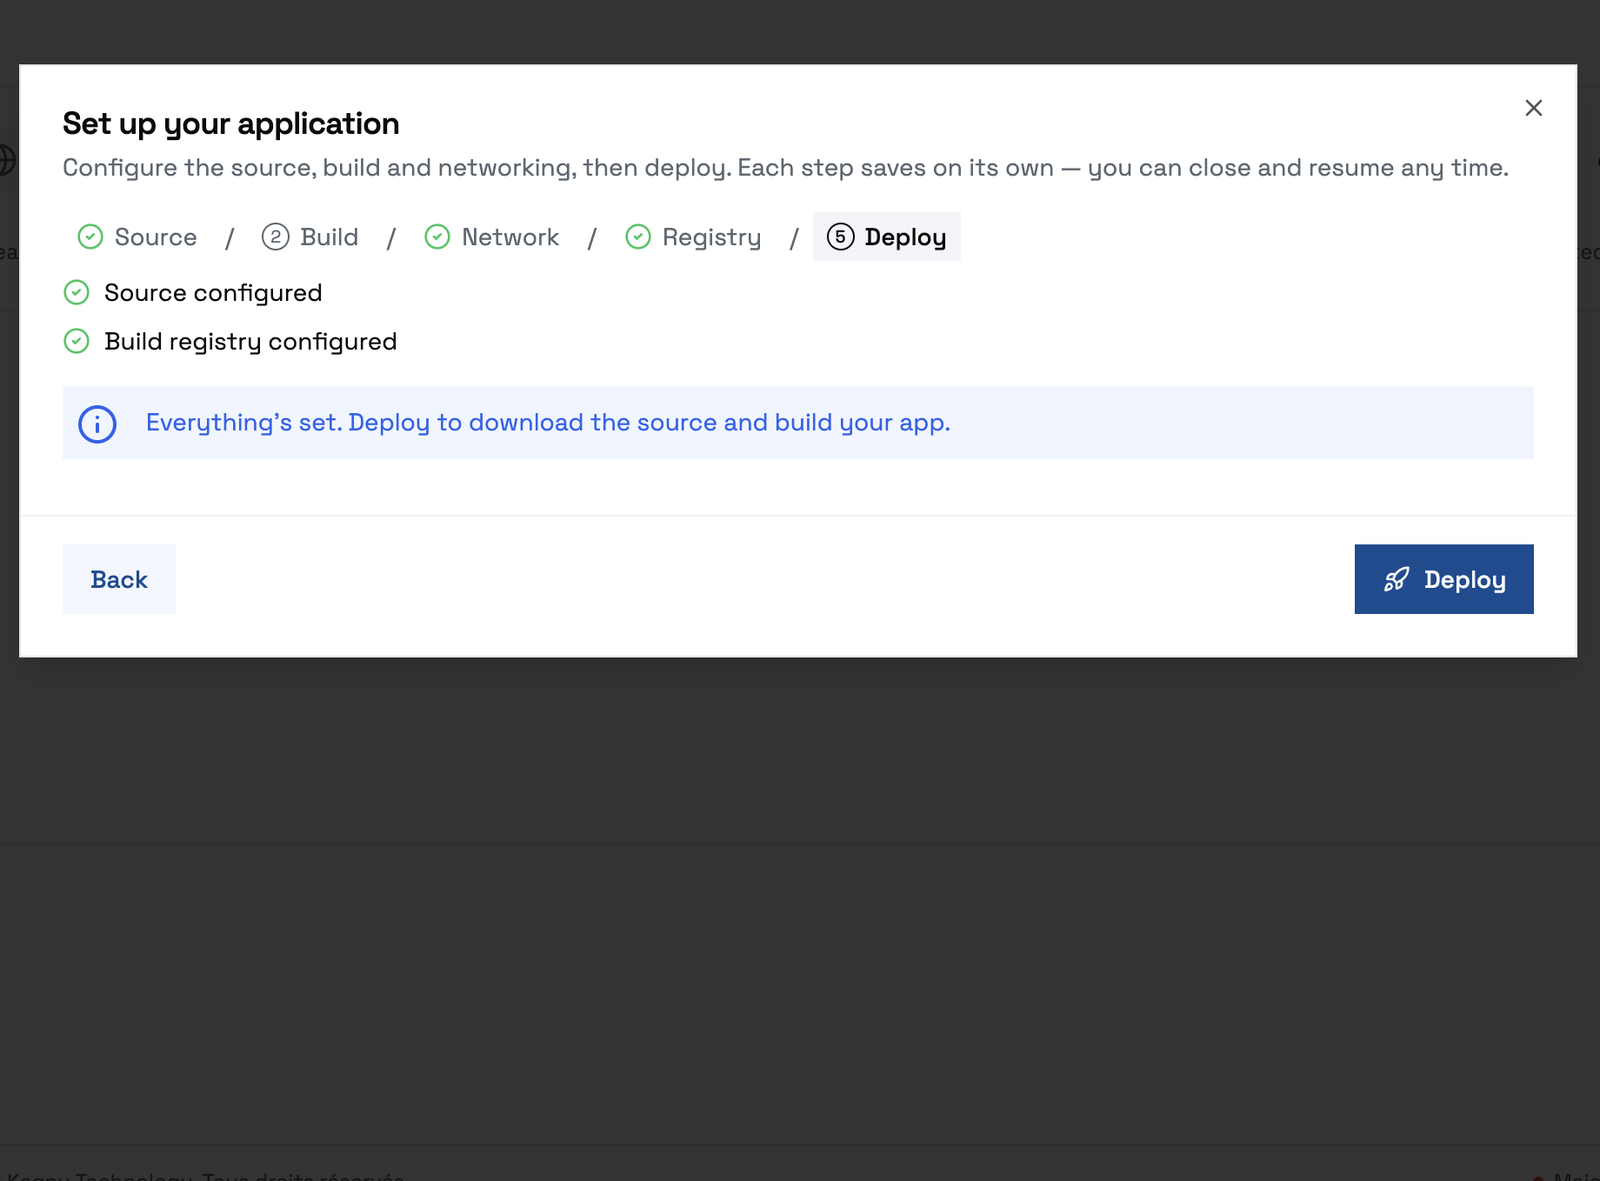
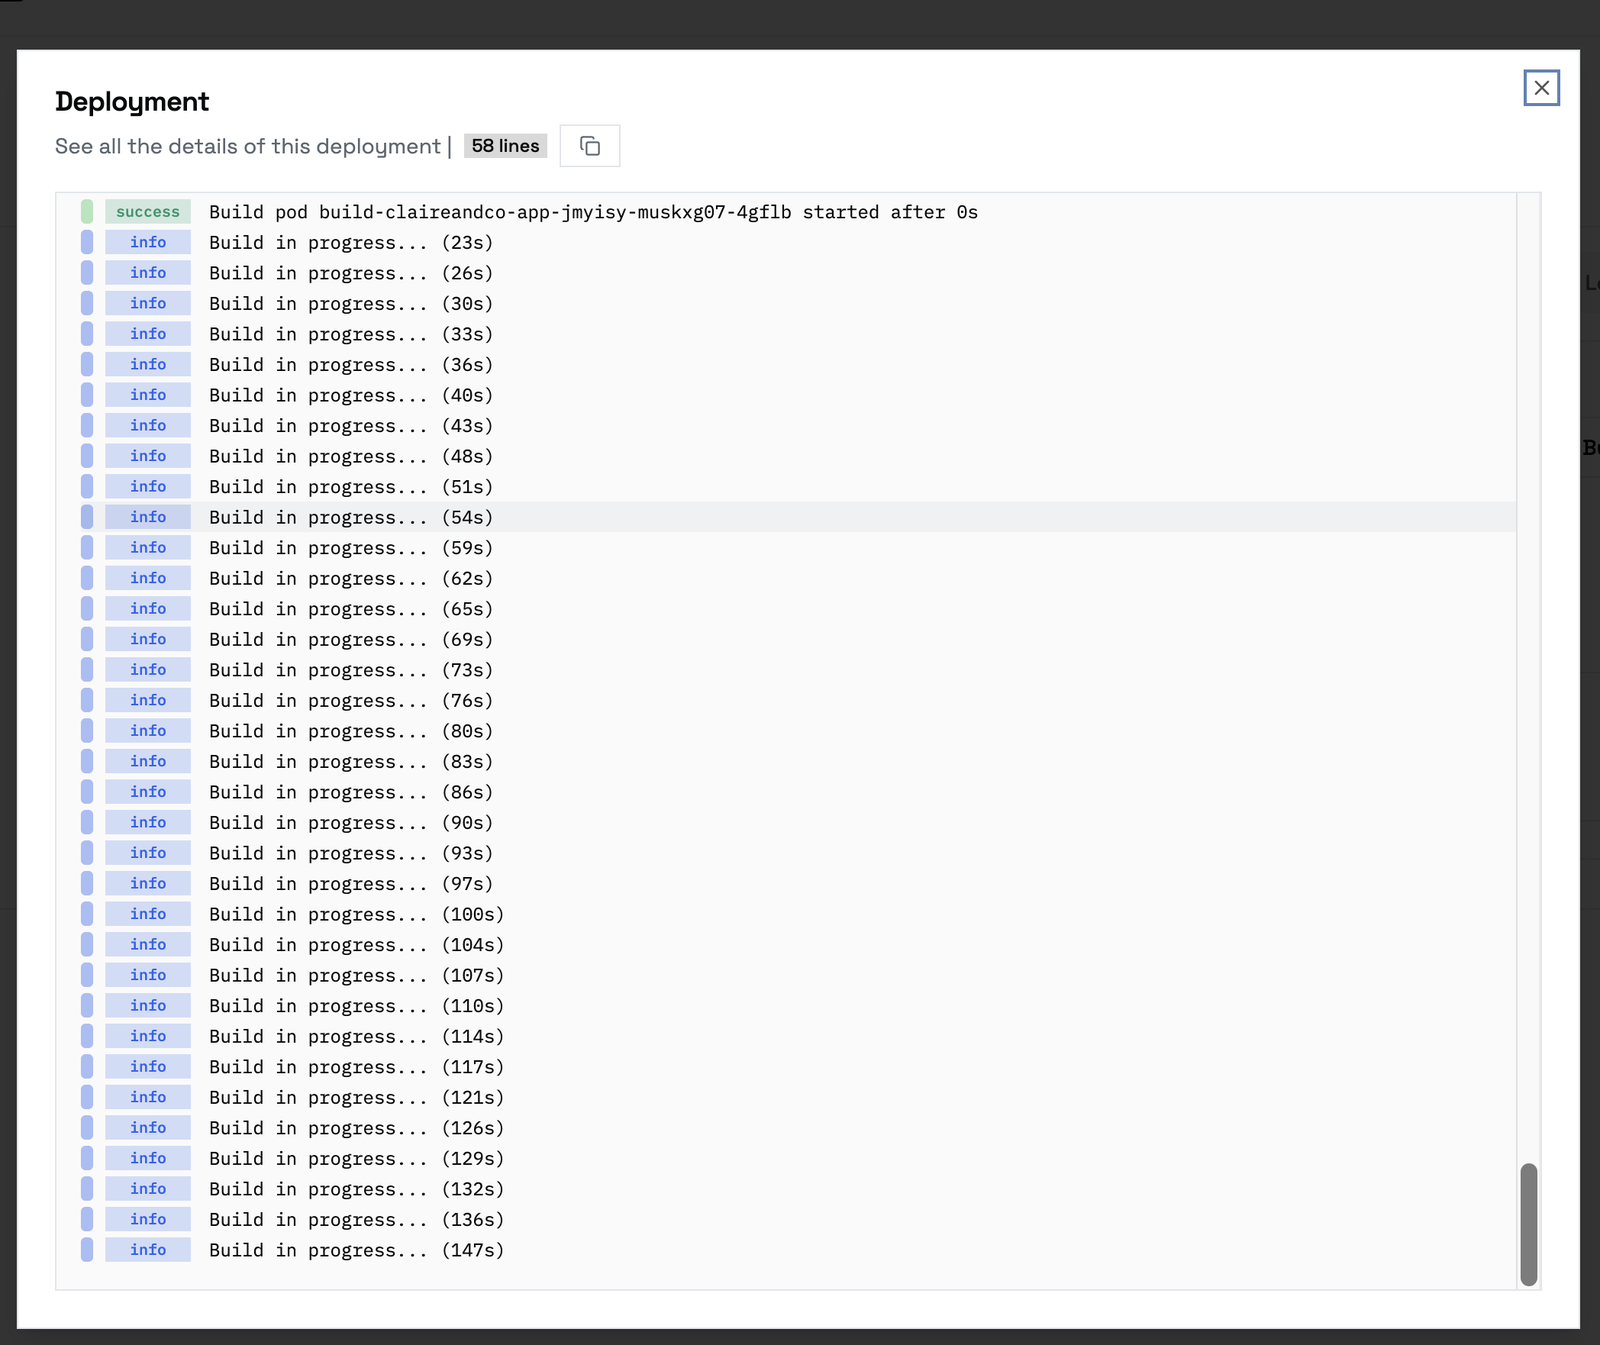
Watch the build output as it runs:
Access Your Application
After deployment, your application is available at:
https://[app-name]-[random-id].kuploy.app
You can find the full URL in the application overview page.
Add a custom domain to use your own URL like app.yourdomain.com.
Automatic Deployments
Enable automatic deployments to redeploy whenever you push to your branch:
- Go to Settings → Source
- Toggle Auto Deploy on
- Optionally add branch filters or path filters
Now every push to your configured branch will trigger a new deployment automatically.
Next Steps
- Configure environment variables for your application
- Add a custom domain with automatic SSL
- Set up a database for your application
- Configure monitoring and alerts